This documentation provides a step-by-step guide on integrating a custom HTML code into a Klaviyo email template. Follow these instructions to navigate through the Klaviyo dashboard and add a Text block with a custom HTML source code.
Prerequisites
Before you customize your Klaviyo email templates with dynamic data, you need to set up a custom endpoint as a Web Feed in your user profile settings. Follow these steps to integrate your custom endpoint and ensure that dynamic data is injected into your email templates.
- Access to a Klaviyo account. You might need to have the permission to edit email templates or change store settings.
- Basic knowledge of HTML and email template customization.
Steps to set up data feeds
Login to Klaviyo
- Open your preferred web browser and navigate to Klaviyo.
- Log in to your Klaviyo account using your credentials.
- In the bottom-left corner of the Klaviyo dashboard, click on your account name or profile picture.
- Select Settings from the menu.
- Navigate to Settings > Other

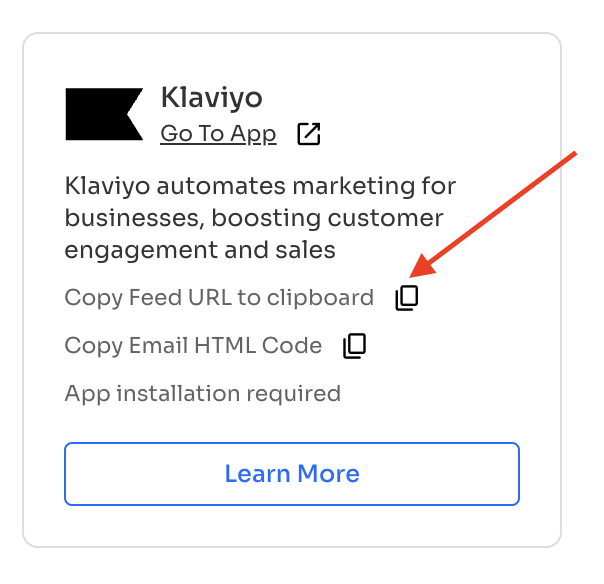
- On the EcoCart admin panel, go to Integrations tab, and click Copy API Endpoint. The copied text should look something like https://merchants-analytics.ecocart.io/stats/klaviyo/yourshopify.myshopify.com
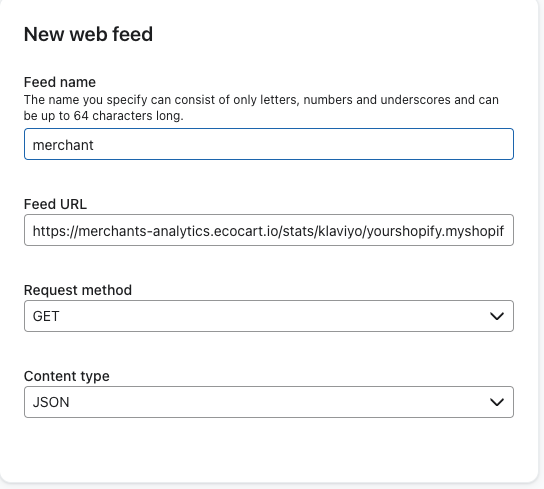
- Enter merchant as the "Feed name". Paste the copied to the Feed URL. Request method is "GET". Content type is JSON.
Verify Web Feed Integration
- After saving, check the Web Feed status to ensure successful integration. You can click the "Preview" button to see if the integration is successful. If it is successful, data will be returned.
- Your custom endpoint is now set up as a Web Feed in your user profile settings. You can proceed to the next step to customize your email templates, incorporating dynamic data from the integrated Web Feed.
Email Template Setup
Now that you've configured the web feed. (If you haven't done so yet, please go back to the previous section and follow the steps). Let's move on to integrating the code into your email template.
Navigate to Templates
- Under the Content section, select Template
- This will take you to the Email Templates page.
- On the Email Templates page, browse and select the template you want to customize.
- Create a new template or click on the template you wish to edit.
- Once you've selected a template, click Edit Template, and you will be directed to the Template Editor.
Template Editor
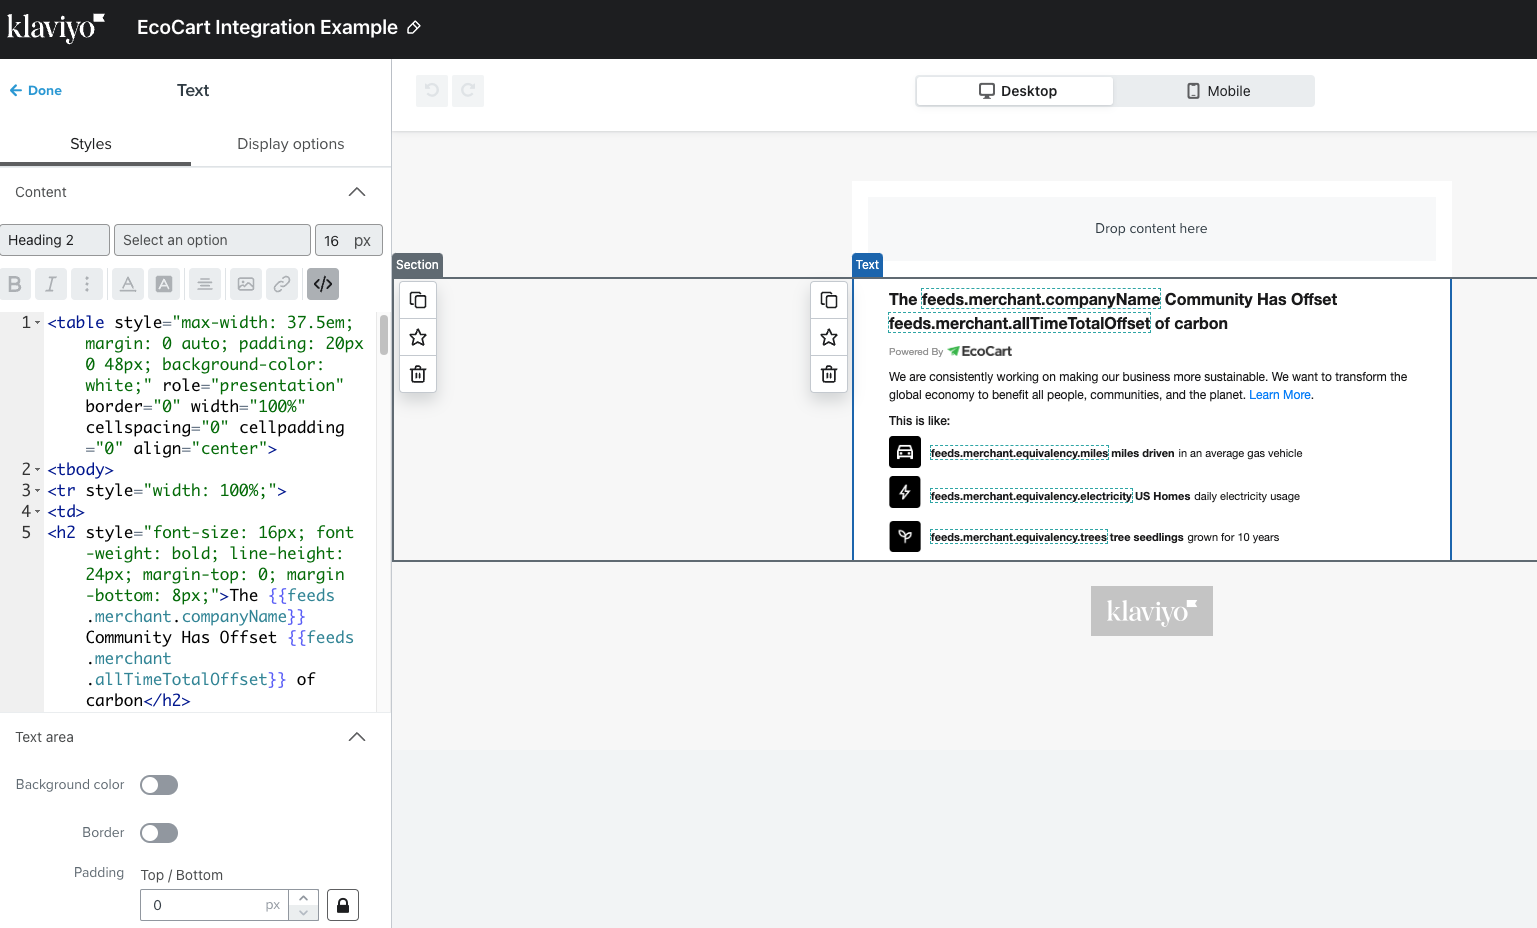
- Within the Template Editor, locate the section where you want to add the custom HTML code.
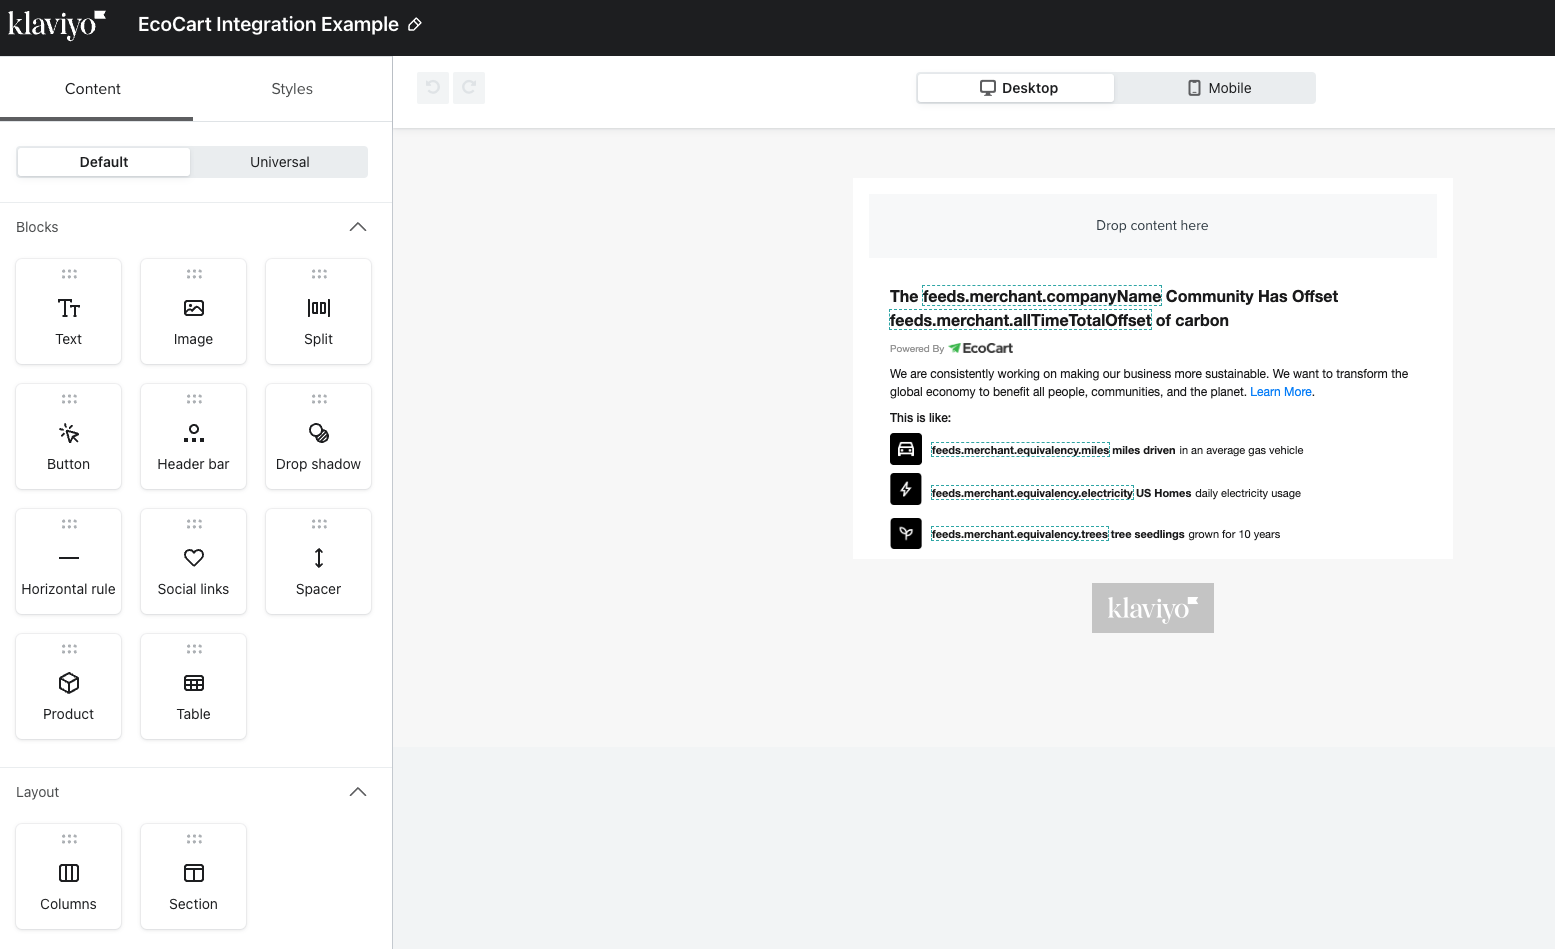 Add a Text Block
- To add a Text block, drag the Text Icon to your template
- After adding the Text block, click on it to select and reveal the editing options.
- Look for the Source Code or </> icon. Click on it to switch to HTML mode.
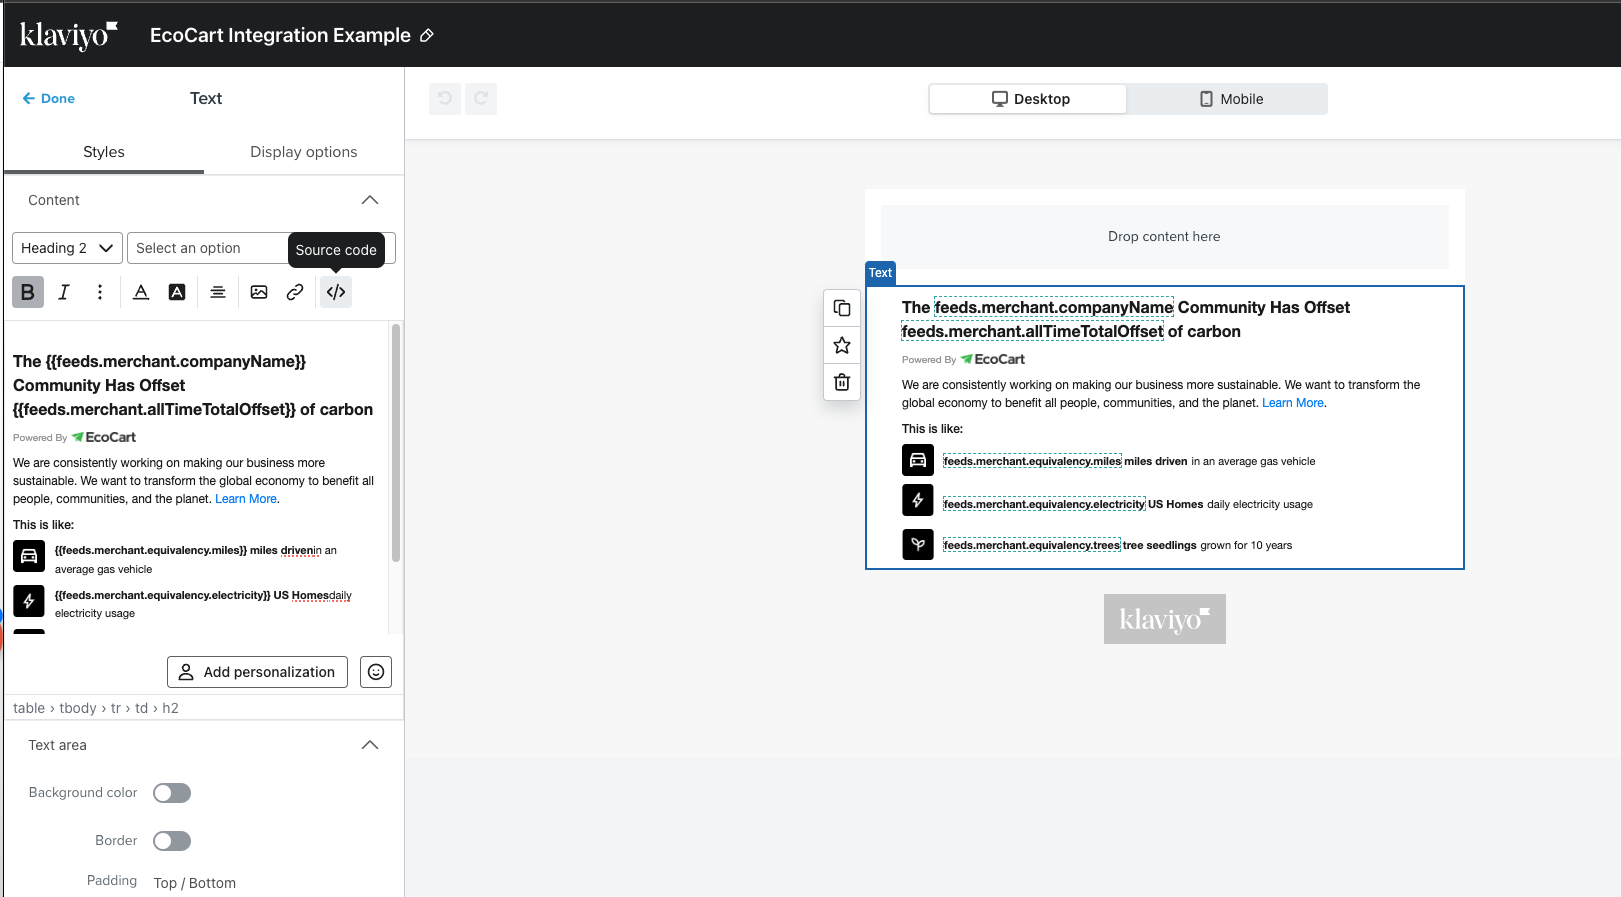
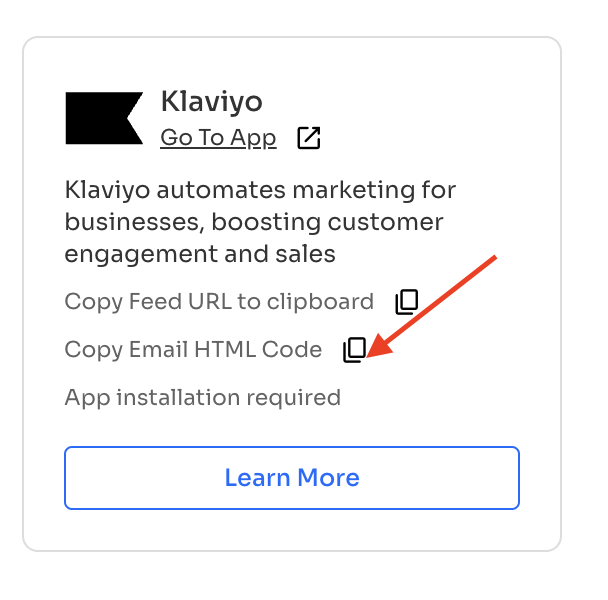
- In the HTML editor, paste the HTML code for your custom content. You can grib the HTML code from the EcoCart's dashboard > Integration tab > Klaviyo > Copy Email HTML Code (see screenshot below). Ensure that your HTML code is correctly formatted and free of errors. You should be able to preview the email as well.
Please note that when using the Source Code editor, styling options may be limited within Klaviyo. The platform may have a predefined set of styles to maintain consistent email rendering across different email clients.
Keep in mind that customization options for styling within the HTML code may be restricted to maintain the compatibility and responsiveness of your email across various email clients.
It is crucial to have a good understanding of building email templates in HTML and CSS before making any modifications to the Source Code. We recommend keeping the HTML code as-is and seeking assistance from someone with the necessary expertise only if changes are necessary.
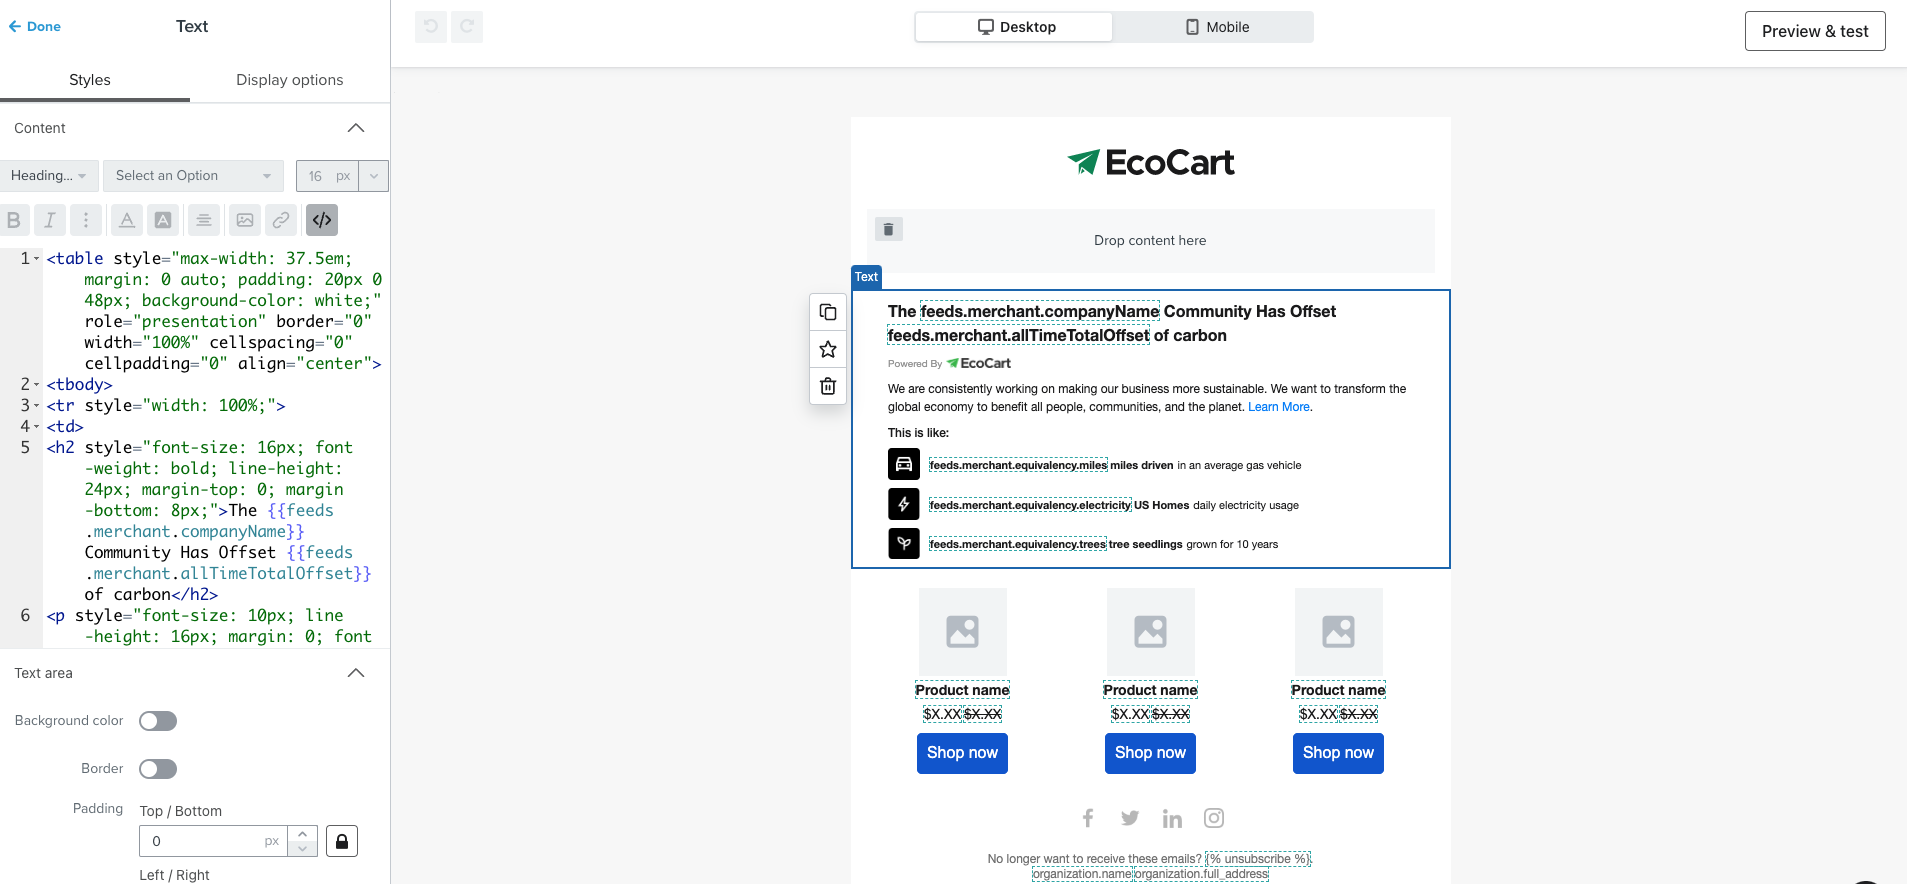
Before sending out emails, use the preview option to see how your template looks. Send a test email to yourself to ensure that the layout and design are as expected using the Preview & Test button on the top right corner.
Congratulations! You have successfully integrated a custom HTML code into a Klaviyo email template. If you encounter any issues or have questions, refer to Klaviyo's official documentation or contact us for assistance.